The ability to segment words into sounds and the ability to blend sounds into words (oral blending and segmenting) are vital prerequisite skills for spelling and reading. Young children learning the English language initially perceive words as whole units, as their focus is meaning. They have to be explicitly taught that words are made up of a sequence of speech sounds (phonemes). Development of this understanding requires direct instruction, modelling, and lots of practice opportunities for breaking words apart into their component sounds and putting those sounds back together to form words. It is tempting to plunge straight into phonics in the first year of school, but if you spend a little time on oral blending and segmenting, it will make blending and segmenting with letters easier!
This blog post will talk about the steps involved in developing oral segmenting and blending skills and suggest activities teachers and parents can use.
Phonemes are the smallest units of spoken language and can be quite hard to identify due to co-articulation*. Some phonemes are particularly hard to identify if the child’s first language does not contain those phonemes, if the child has auditory functioning or processing difficulties or if the child has a specific learning difficulty such as dyslexia. It makes sense, therefore, to start to teach the skills of segmenting and blending with larger language units – words and syllables. It is also important that activities initially focus on listening and speaking and not involve written words or letters. Later, systematic teaching of the letter-sound correspondences used in written words, such as that provided in Phonics Hero, will strengthen phonemic awareness because its focus is the phoneme level of language.
Development of the skill of segmenting should begin with segmenting sentences into words. Start with very short sentences and build up to longer sentences. Before introducing the visual concept of gaps between words, use physical movement to represent the boundaries between words. Here are some suggestions:
When teachers have children accompany both syllables and sounds with clapping, the children often end up struggling to differentiate a syllable from a sound. I ask children to sing syllables (as in “Hap-py-birth-day-to-you”) and make the connection between syllables, rhythm and music. The notes used are irrelevant. Discriminate first between one- and two-syllable words, then two- and three-syllable words and so on. You can emphasise the link to rhythm by asking them to use a musical instrument or move body parts (e.g. make robot-like jerky movements) to show syllables. Some teachers have children stand and touch their head-shoulders-knees and toes in the order of the syllables as they say a word.
If you want children to truly understand how syllables work, teach them to put a finger under their chin and feel it move when they say each syllable in a word. There should be one ‘jaw drop’ for each syllable because the vowel in the syllable causes a jaw drop. Begin with compound words such as ‘snow-man’.
To make the link between number of syllables and length of a word, laminate our paw-print and space them out on the floor. Say a word and ask the child to walk on the correct number of paw prints, one step per syllable, saying the word. Syllables can also be represented with blocks or rods on a table.
 Free 1-4 Syllable Picture and Number Cards.
We’ve made some free syllable cards. Here are some ideas for how to use them:
Segmentation of words into onset (the consonant/s before the first vowel sound) and rime (the vowel sound and everything that follows it) is often introduced as the next stage as the isolation of an initial sound is usually easier than isolation of the sounds that follow. This segmentation can help children to read and spell by analogy but can also lead to undue focus on the initial sound and guessing of the rime in reading.
Teachers often talk about segmenting a word into phonemes as ‘stretching’ the word. A visual and tactile support for this concept is saying the word with hands together, palms inward, and moving them out from each other as each sound in the word is said in order. Putting an elastic band around the hands allows the ‘stretch’ to be felt more easily. I’ve seen teachers use a ‘slinky’ in a similar way. Saying words in phonemes is sometimes referred to, for children, as ‘sound talk’, ‘robot talk’ or ‘snail talk’.
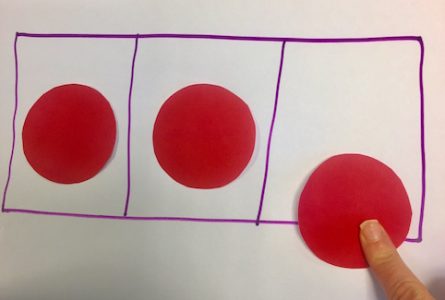
‘Sound buttons’ can be used to represent the sounds in segmented words. The child puts down a counter for each sound he hears, often in a ‘phoneme frame’ (originally called Elkonin boxes). The child can then be asked to put a finger on the ‘button’ and say the sound it represents in the word.
 Sound buttons in a phoneme frame.
 Battery-operated push lights are an attractive variation on this idea. Start with segmenting words made up of two phonemes then contrast these with words of three phonemes before moving on to longer words. Phonics Hero incorporates phoneme segmentation without letters in the first spelling game on each level.
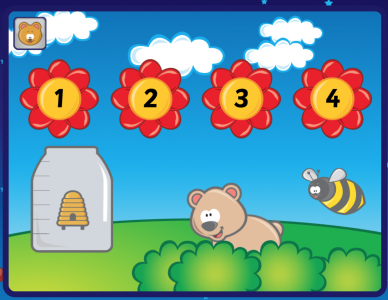
 An example of a phoneme counting game.
It can be hard for children to hear the component sounds in consonant blends, especially in the final position, (e.g. ‘nd’) so particular attention must be given to representing each sound in these. Fingers can be used to count sounds. Game activities for segmenting include:
Blending is the inverse of segmenting. Teaching the two skills side by side will help children to understand that relationship. Begin instruction in blending with compound words. Say each segment with a time-lapse long enough to challenge working memory (e.g. ‘foot – ball’) and ask the children to say the word faster, as one unit.
When segmenting words into phonemes, the child stretches the word (and his elastic band or slinky). When he blends phonemes, he pushes the sounds (hands, elastic band or slinky) back into the original position. If he is using a phoneme frame, he can be asked to slide his finger quickly underneath each box, saying the sound in each box in order.
The image of children on a slippery slide can be useful in helping a young child to understand the smoothness and speed of movement and the ‘bumping into each other’ of the sounds in blending.
Blending activities should begin with words made up of continuous sounds (sounds that can be prolonged without distortion: /f/, /l/, /m/, /n/, /r/, /s/, /v/, /w/, /y/, /z/ and the vowel sounds) e.g. ‘ran’. The child should keep saying one sound until he identifies the next, not take a break between sounds, as this overloads working memory. The aim is smooth transition from one sound to the next. Words ending in a stop sound can be added when blending of continuous sounds has been mastered.
It is critical that pure sounds be used and that the schwa /uh/ is not added to the stop sound, as heard in ‘buh-a-tuh’ for ‘bat’. Read our blog post for more on the schwa sound. When blending with stop sounds at the beginning of the word, prompt children to blend the stop sound with the continuous sound next to it. For instance, in ‘cat’, the /ca/ would be blended and the /t/ added.
Start with 2-phoneme words and build up gradually. The working memory span of a child will limit the number of sounds a child can recall and blend, so you should be aware of individual limitations.
Useful activities include:
Here is a great video demonstrating the teaching of oral blending and segmenting in a group setting:
Once a child is accurately segmenting and blending orally with consistency, she is ready for the addition of another cognitive layer – knowledge of letter-sound correspondence. For help adding segmenting and blending into your phonics lessons, try our no-prep Phonics Lessons, an interactive resource for teachers, for free.
*Coarticulation: the articulation of two or more phonemes together, so that one affects the sound of the other, e.g. when you say the word ‘happy’. Before you say anything, you will start breathing out, and you will have moved your tongue into position for ‘a ‘and started opening your mouth for ‘a’. Then, while you are hissing for ‘h’, it will sound a bit like a whispered ‘a’.
See the Phonics Difference When You Sign Up for a FREE Teacher Account
One thought on "Oral Blending and Segmenting – Before Letters, There Were Sounds!"