Reset and/or Transfer an Account From One Child to Another
We are happy for you to ‘recycle’ your Child Accounts within your subscription period. You might use this feature in the following situations:
- A student leaves your school and you want to use the account with a different child.
- A student no longer needs phonics support and you would like to give it to a younger child.
- A student leaves and you want to leave it as a ‘spare’ account for when a new student joins.
To reset and/or transfer a Child Account to a new student:
i
Where to find this: Log in › Manage Accounts › Classes & Students
- Scroll down to Classes & Students and expand the class of the student whose account you wish to transfer.

- Select the checkbox next to the student’s name.

- Click the Reset & Transfer button in the top right corner.

Continue with the steps below to transfer an account from one student to another, or follow these instructions to reset an account and leave it as a spare.
Transfer an Account
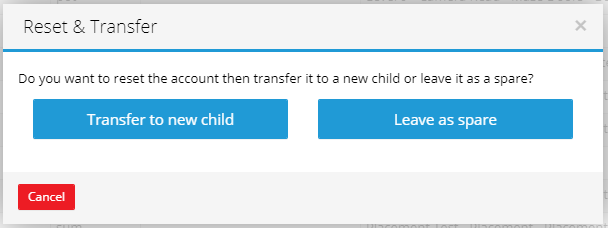
- A pop-up window will appear asking if you would like to transfer the account or leave it as a spare. Click the blue Transfer to new child button.
- A message will appear asking you to confirm. When you’re ready, click Confirm.
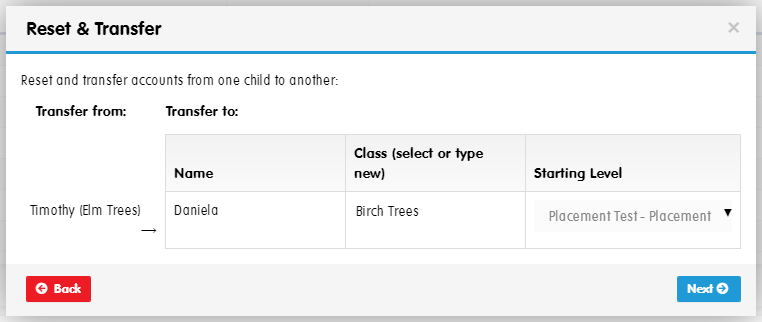
- Enter the name and class of the child you wish to transfer the account to and, if necessary, change the child’s starting level. When you’re ready, click Next.
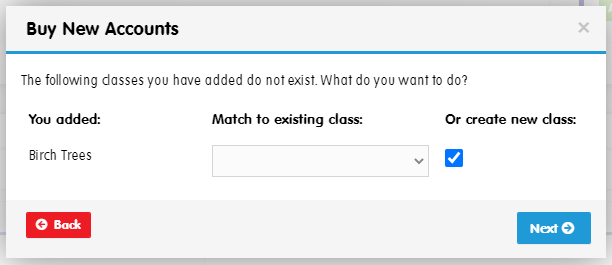
- If you’ve added a class name that doesn’t exist, you can either match it to an existing class or select the checkbox to create a new class. Click Next when you are ready.
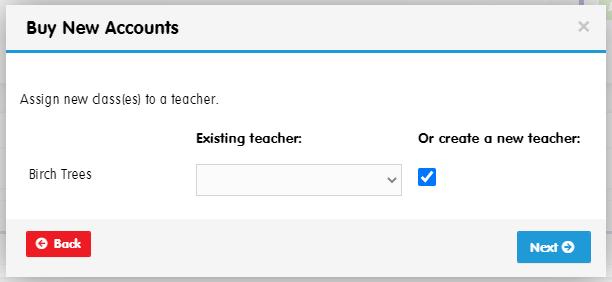
- If you chose to create a new class, an extra window will appear. You can assign an existing teacher to your new class or create a new teacher. Once you have made your choice, click Next.
- If you opted to create a new teacher, enter their name, email and password in the window that appears and click Next.
The teacher will receive an email invitation with instructions to create a password — or, if they already have a Phonics Hero account, to transfer their account to your school. - A message will appear asking you to confirm. When you’re ready, click Confirm.
- The last window will confirm the account has been reset and transferred. Click the blue Download Login Cards button to save the login card with their details to your device.
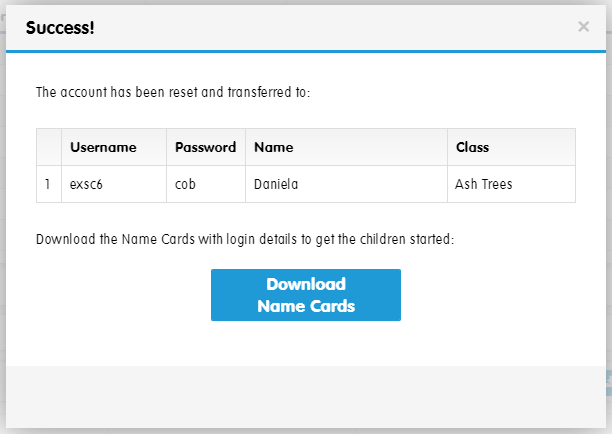
- You can then download a personalised letter to send to parents or guardians so the child can also use their account at home.
Watch the steps:
Reset an Account and Leave It as a Spare
- A pop-up window will appear asking if you would like to transfer the account or leave it as a spare. Click the blue Leave as spare button.
- A message will appear asking you to confirm. When you’re ready, click Confirm.
- A window will appear confirming the account has been reset. Click the green Got it! button.
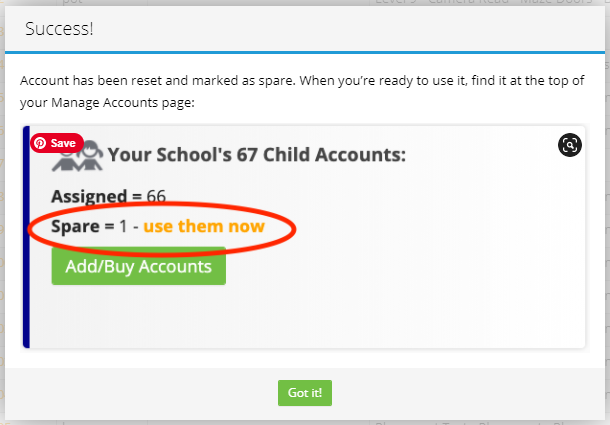
The child’s account has now been reset. When a new student needs an account, you can assign them a spare account.
See the steps in action:
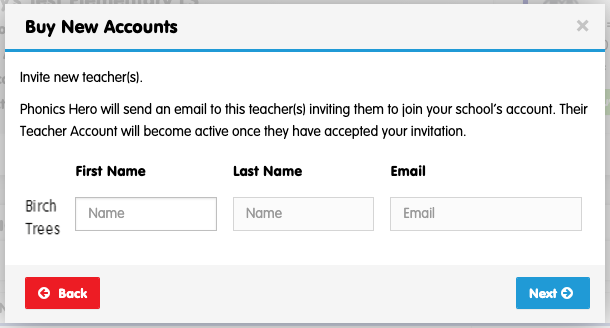
Need additional accounts? Add them directly within your Teacher Account.