Level Pacing
Level Pacing lets you control when new Phonics Hero levels are released to your students, so the game stays in step with what you’re teaching in class. Think of it like a gate in front of the levels you haven’t taught yet. Your students can’t get through — until the date you’ve chosen, when the gate opens and the next level is released.
Pacing only affects new levels going forward. Previous levels can still be played.
Jump to: Edit Pacing · Delete Pacing
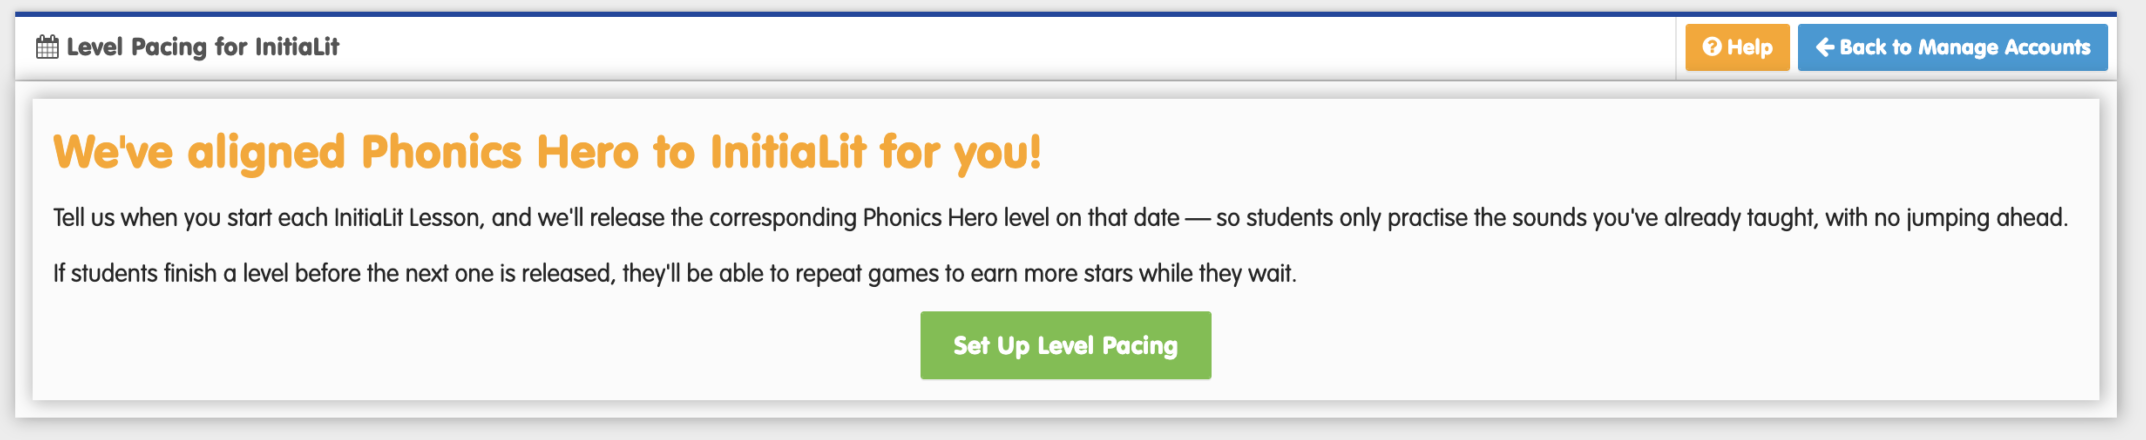
Level Pacing works slightly differently depending on the phonics program your school follows. If you use InitiaLit, we’ll match the Lessons you teach in class to the right Phonics Hero levels.
Let us know whether you use InitiaLit so we can tailor this article:
You’ll pace directly to Phonics Hero levels (Level 1, Level 2, and so on).
You’ll choose dates for when you teach each InitiaLit Lesson, and behind the scenes we’ll release the matching Phonics Hero levels on those dates.
Set up Level Pacing
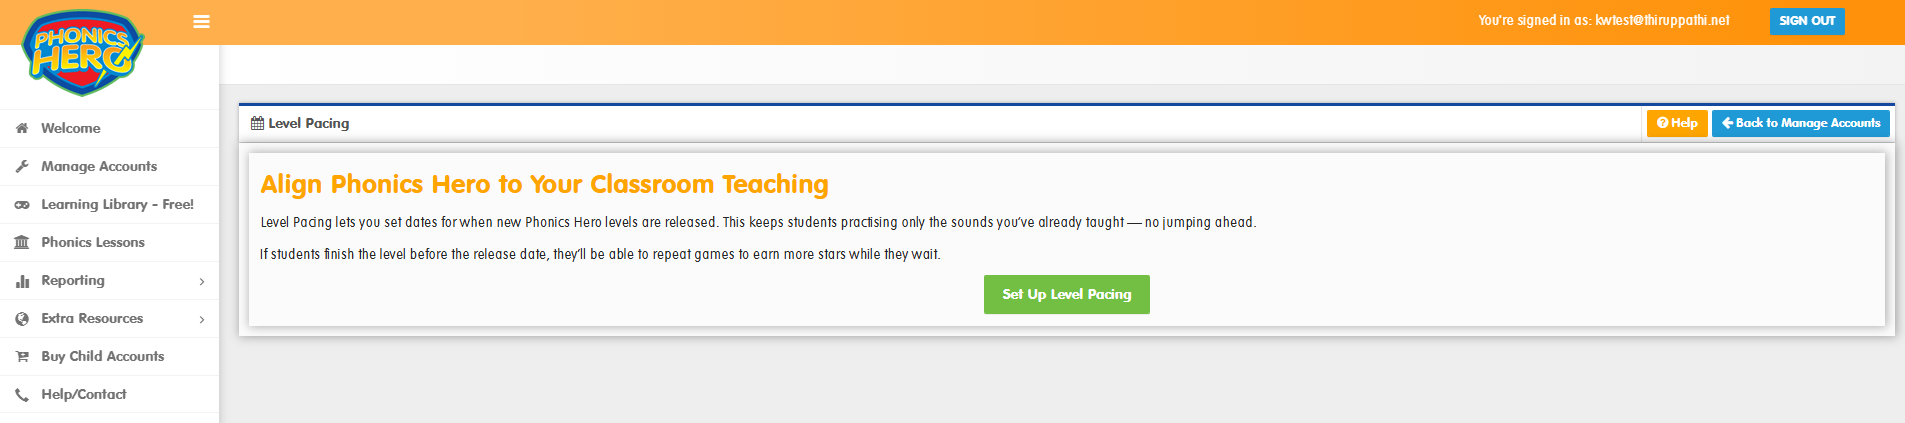
Go to Manage Accounts and click the Level Pacing button in the Classes & Students section. You’ll see a welcome page — click Set Up Level Pacing to start.
Step 1: Select classes and starting levelSet
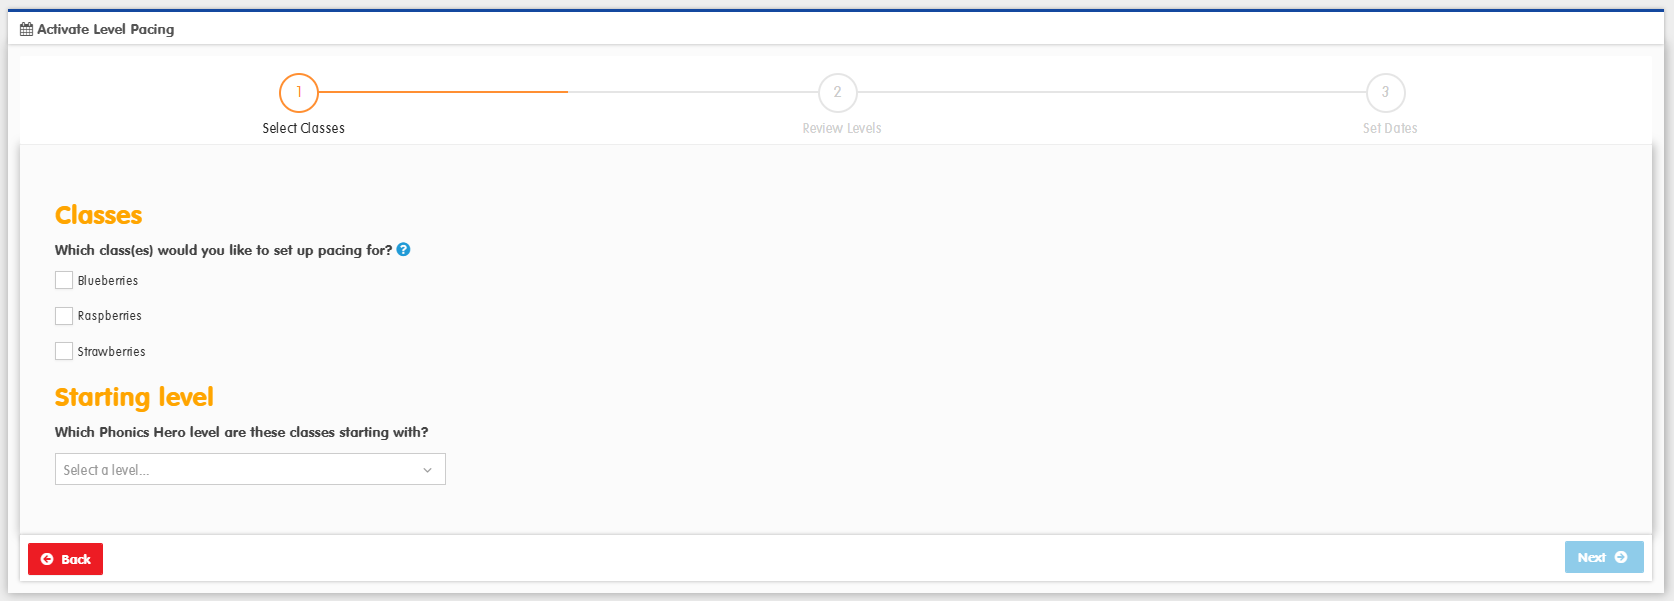
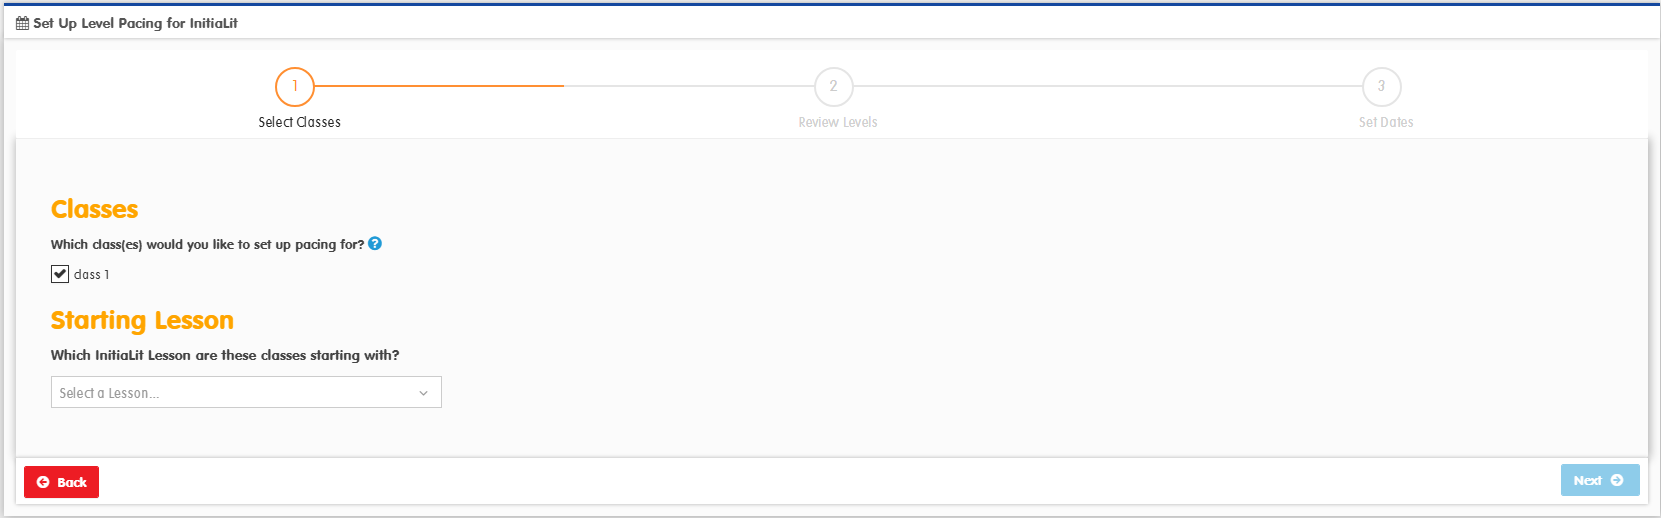
- Select the class or classes you want to pace. You can pace multiple classes together if they’re working at the same levelLesson.
- Choose the Phonics Hero levelInitiaLit Lesson these classes are starting their learning with.
- Click Next.
Classes that already have pacing in place will appear greyed out — edit those from the main Pacing page instead.
Step 2: Review your students’ level
Phonics Hero checks where your students currently sit compared to the starting levelSet you’ve chosen.
For example, if you choose Level 2 as your starting level but one of your students is already on Level 3, we’ll flag them here so you can decide what to do.
For example, if you choose Lesson 2 as your starting Lesson but one of your students is already working at a level matched to Lesson 4, we’ll flag them here so you can decide what to do.
What you see next depends on your students
If all students are at or below the starting levelLesson, you’ll skip straight to Step 3 — nothing to review.
If some students are still on the Placement Test:
The Placement Test can place children as high as Level 7. If your starting point is lower than that, some children could end up further ahead than your pacing allows.
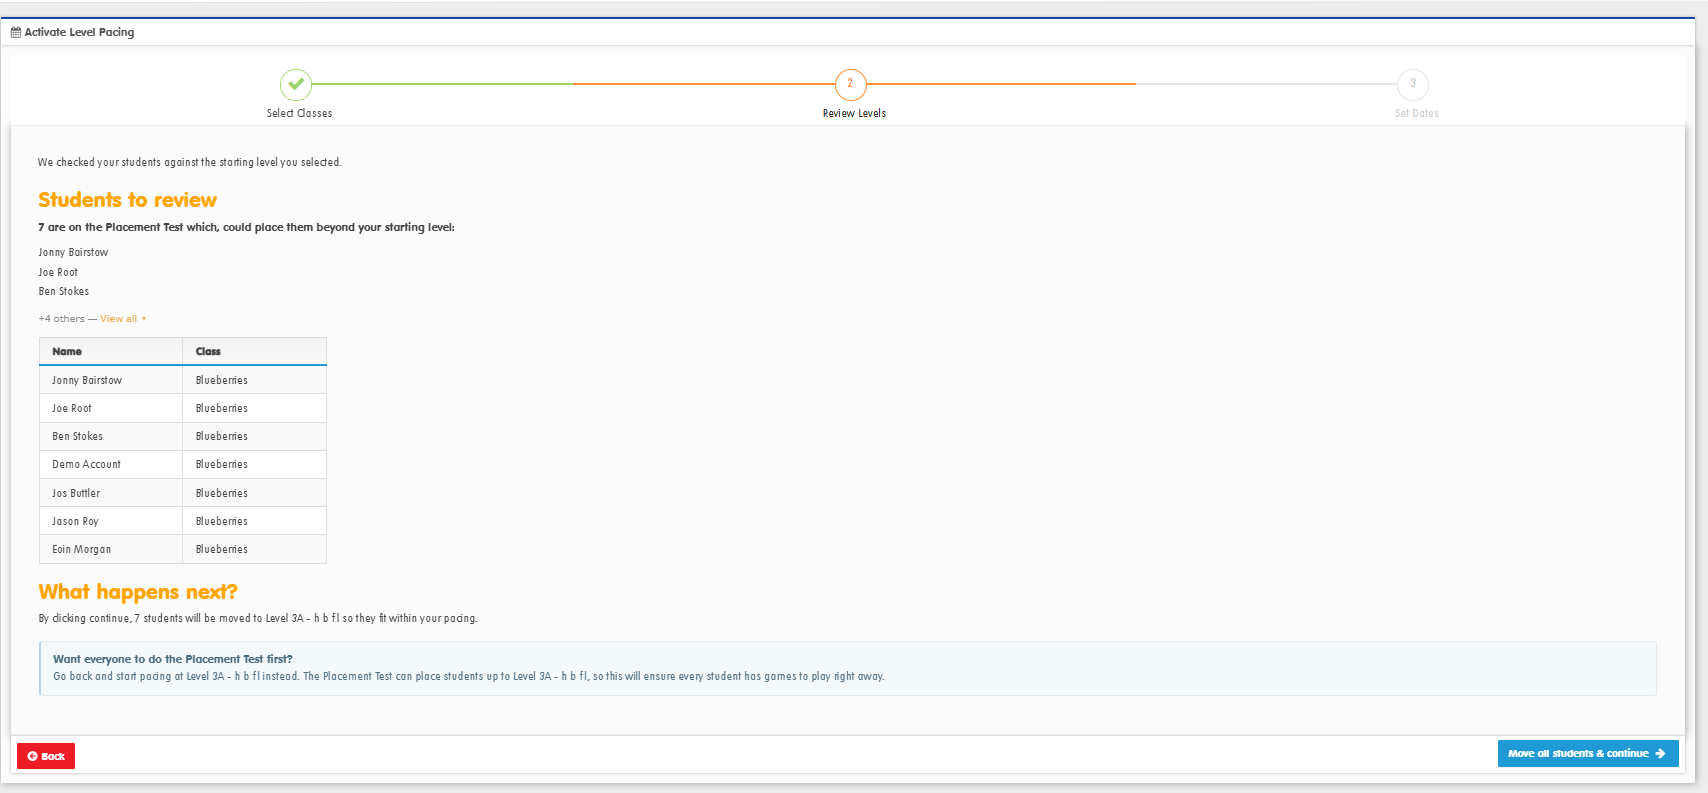
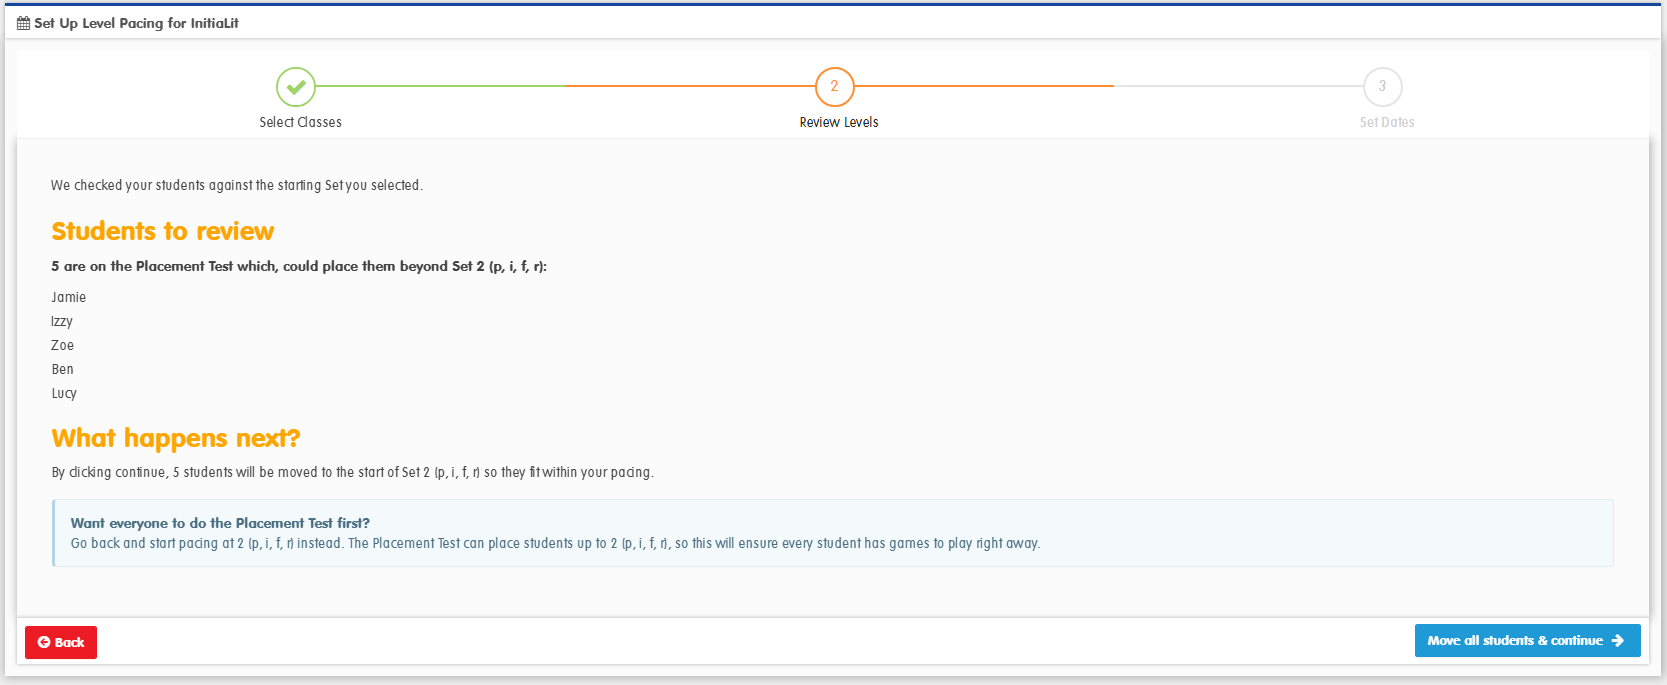
These students will be moved to your starting levelLesson so they fit within your pacing. If you’d rather they complete the Placement Test first, either: exit pacing, let them complete it and then come back to start pacing. Alternatively, edit your starting point to a higher level (this will be suggested) so that children can still do the test.
If some students are ahead of your starting levelLesson:
If we don’t move these children, they won’t be able to play until the pacing ‘catches up’. We check against your starting point and suggest a better point to move them to.
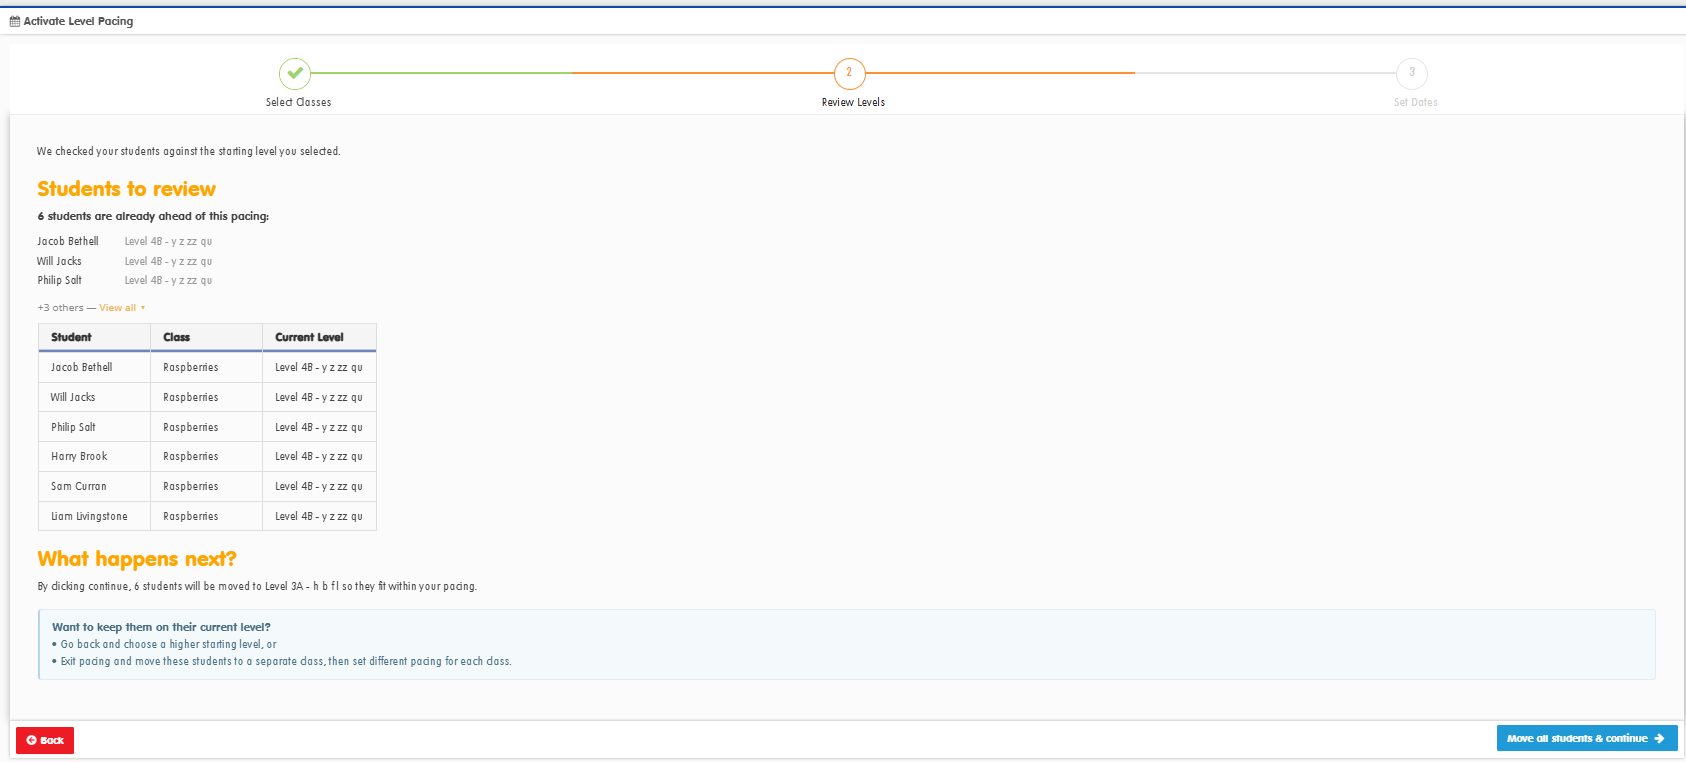
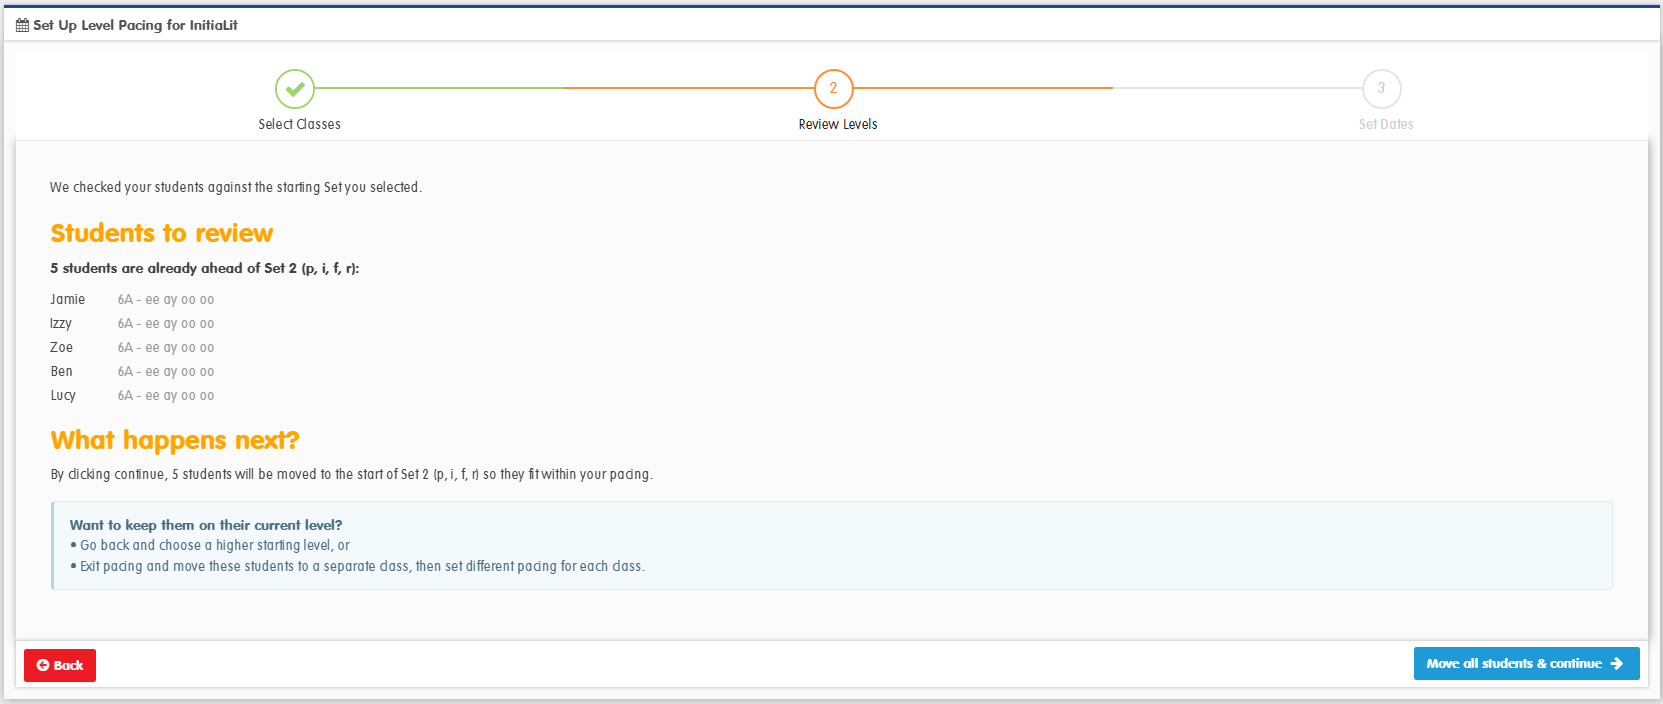
These students will be moved back to your starting levelLesson. If you’d prefer to keep them where they are, you have two options:
- Go back and choose a higher starting levelLesson, or
- Exit pacing, move those students to a separate class, then create different pacing for each class.
If you have a mix of both:
If you have some children on the Placement Test and others already ahead, you can deal with these at the same time.
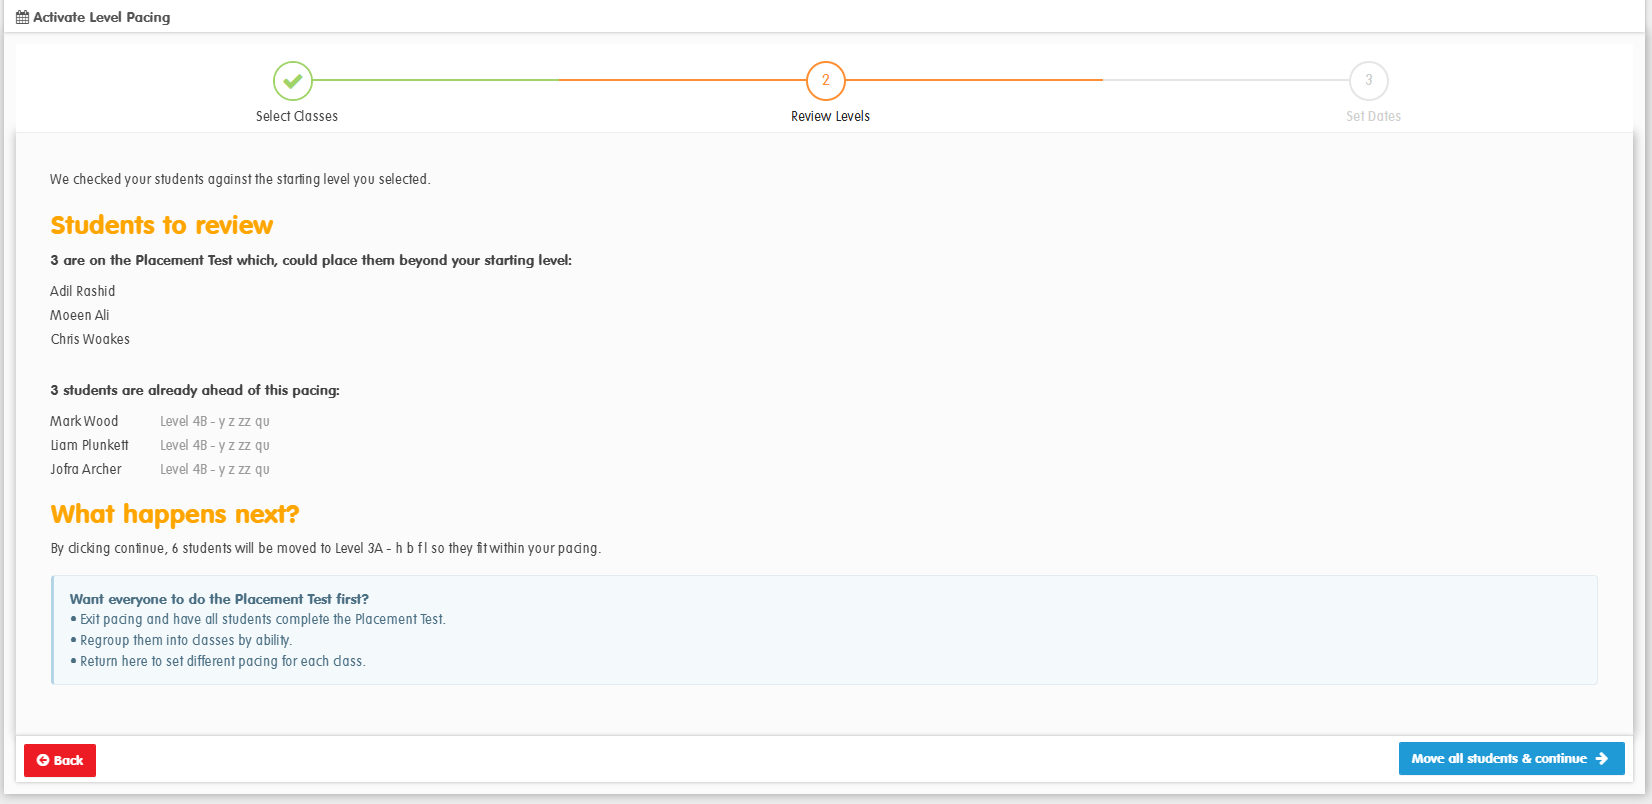
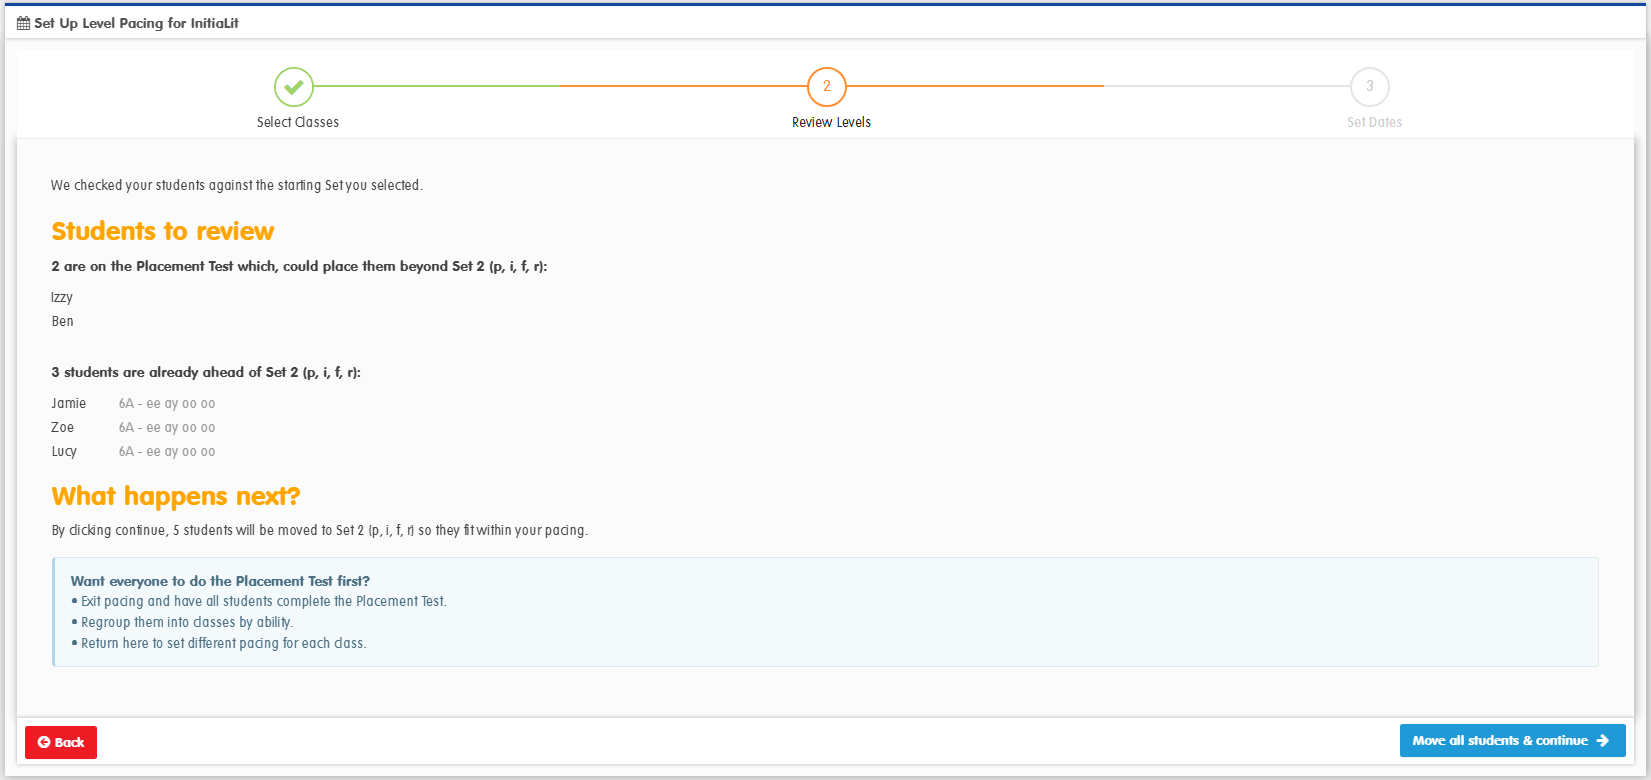
You’ll see both groups listed together and have the option to move them all to a more appropriate level for your starting point.
Click Move all students & continue when you’re ready.
Step 3: Set your release dates
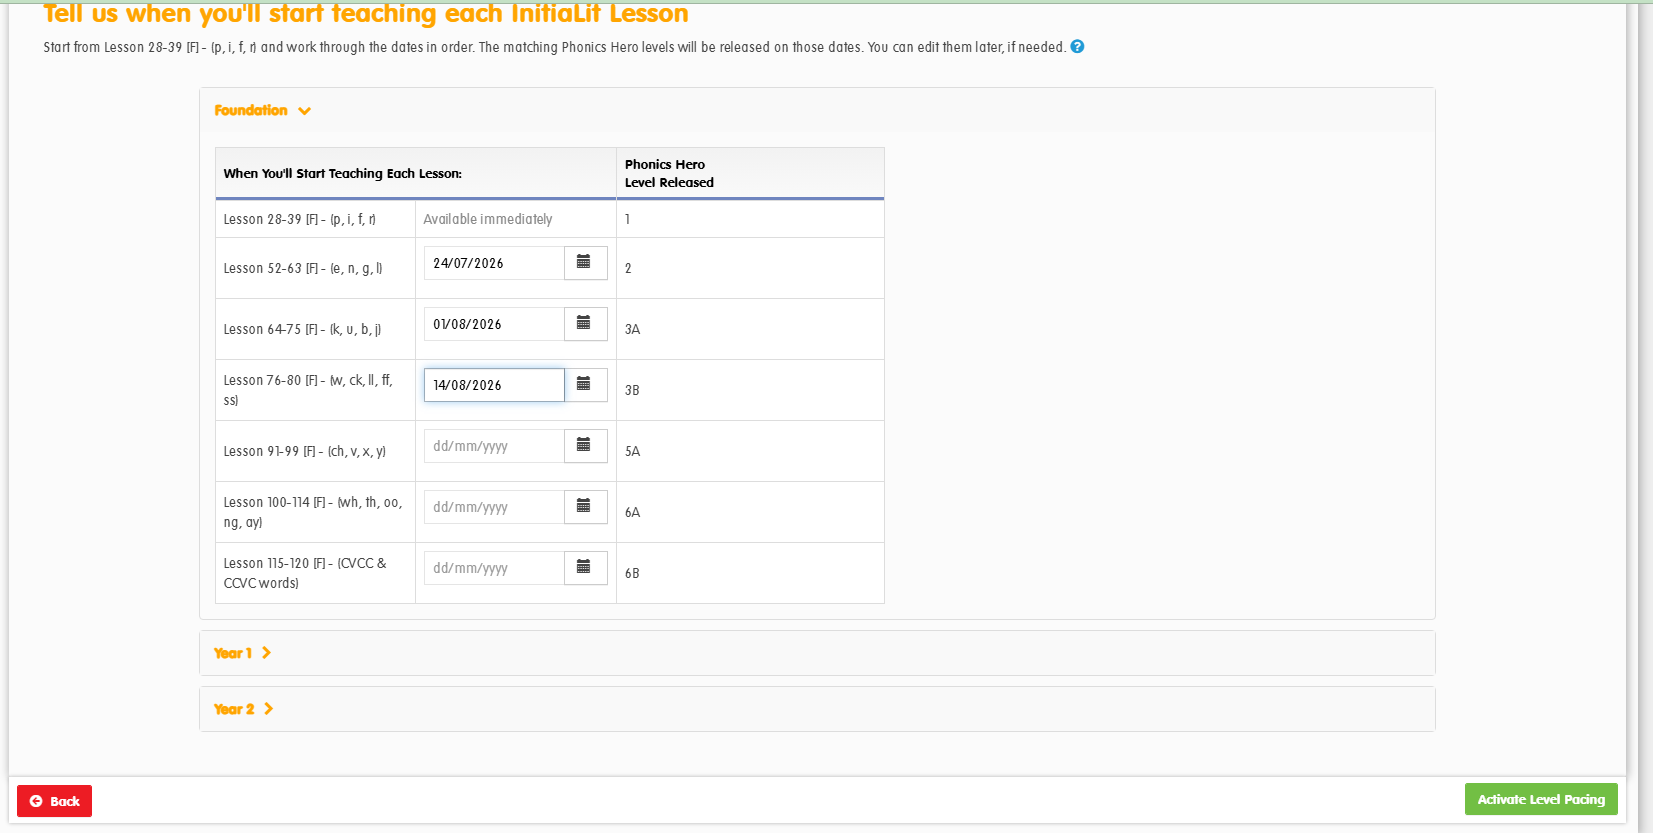
A release date is when you want Phonics Hero to give children access to the games for that levelLesson.
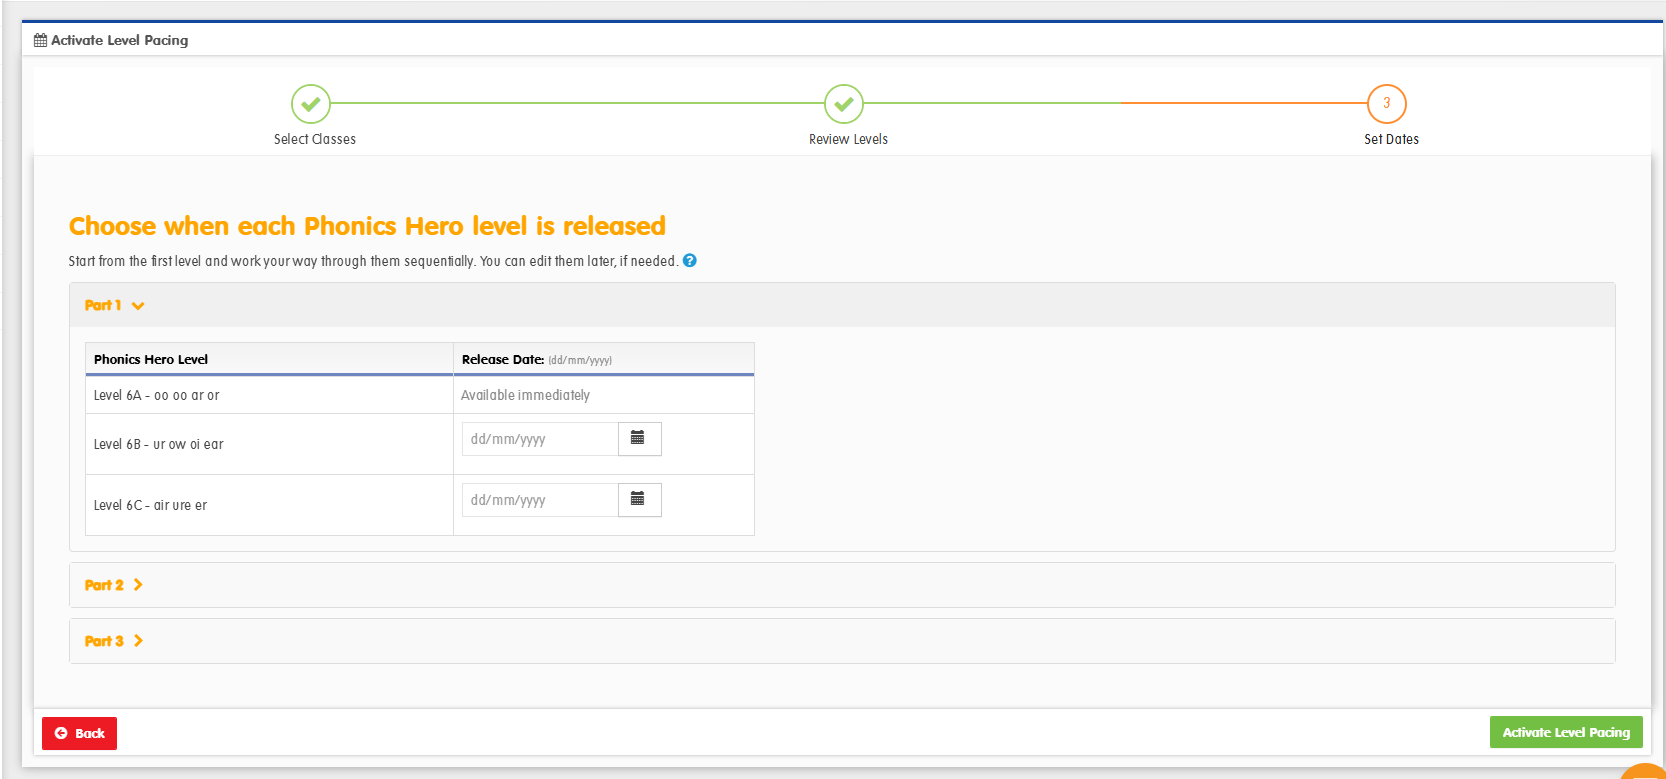
- Work through each Part, entering the date you want each level to release.
- Dates must be in order — each release date should be on or after the one before it.
- You don’t need to fill in every level. Any levels you leave blank stay freely accessible to students.
- Click Activate Level Pacing to save.
- Work through each section (Kindy, Year 1, and so on), entering the date you’ll start teaching each Lesson.
- Dates must be in order — each date should be on or after the one before it.
- You don’t need to fill in every Lesson. Any Lessons you leave blank stay freely accessible to students.
- Click Activate Level Pacing to save.
To pace another class later, click Pace Another Class on the Pacing page — it opens this same wizard.
Edit Pacing
Edit your pacing if you’re working through your classroom program quicker or slower than you expected.
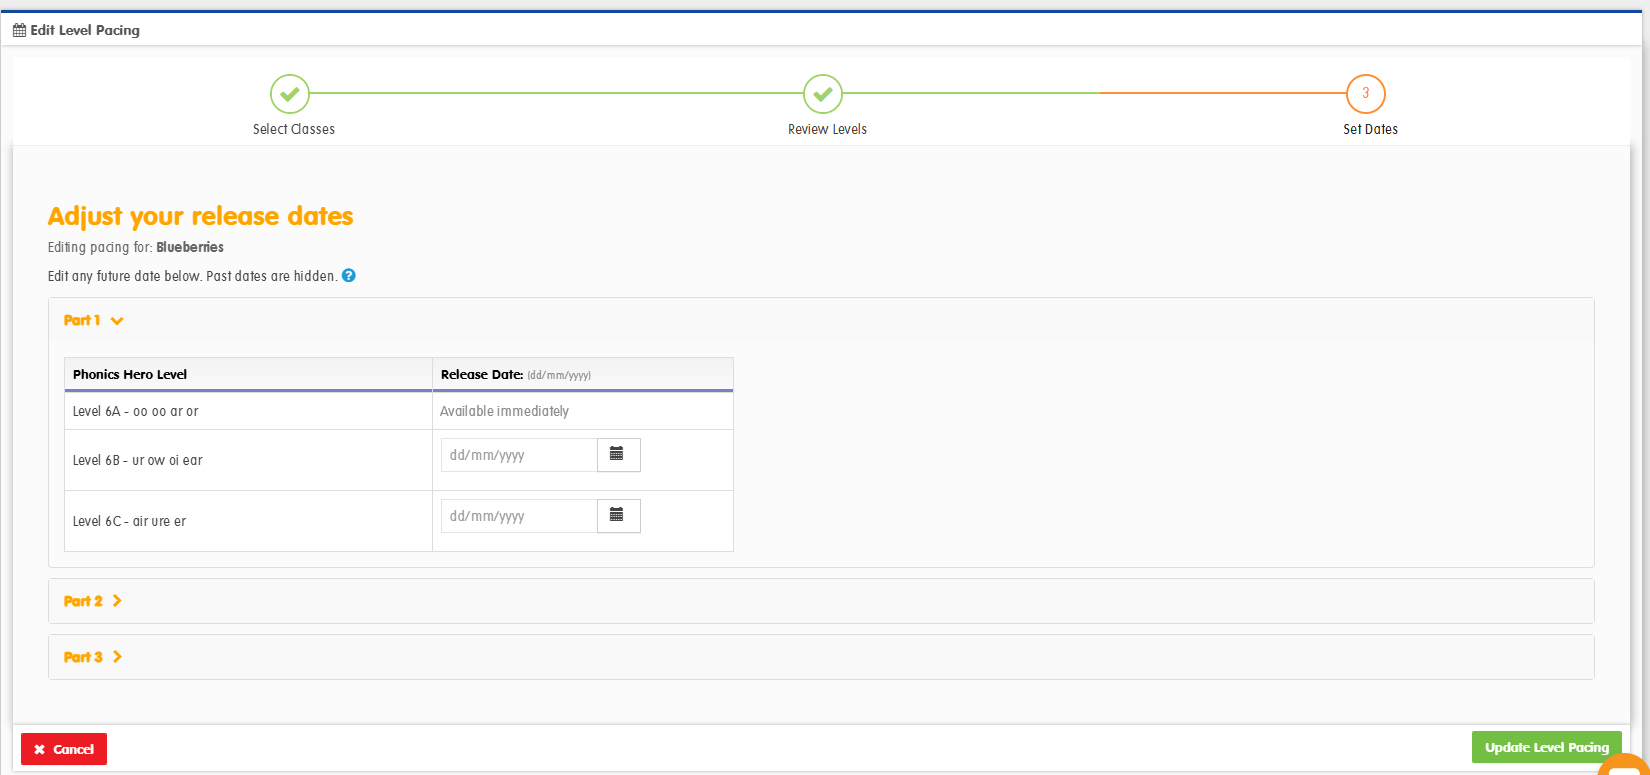
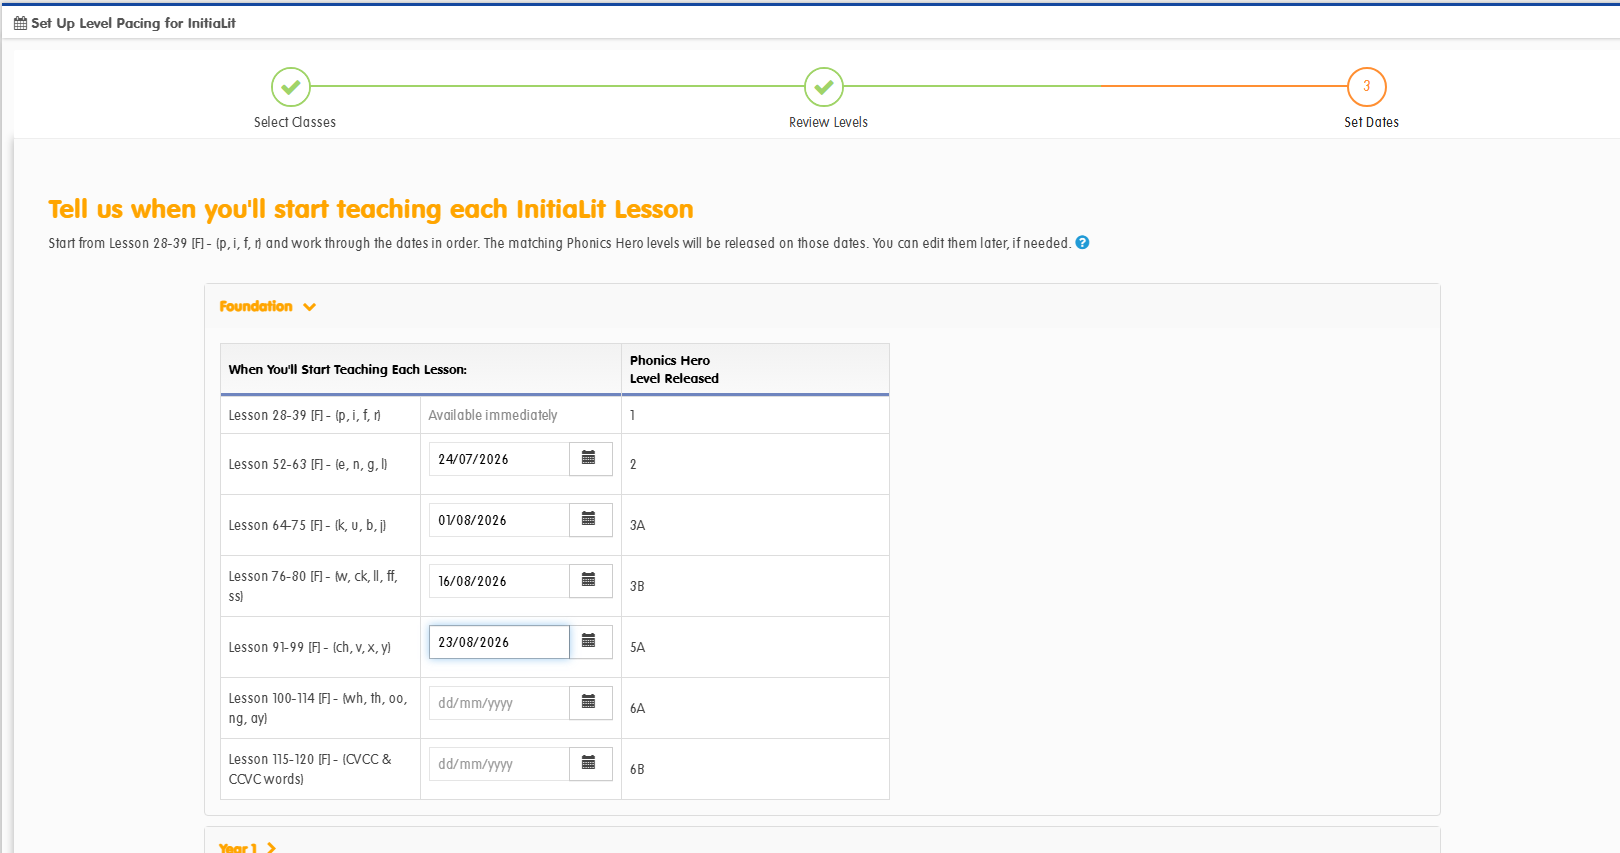
On the Pacing page, find the class you want to edit and click Edit.
Editing works just like the initial setup, with a few differences:
- Your existing dates are already filled in
- Past dates are hidden — you can only change future ones
Can’t see the class you want to edit? If a class isn’t showing on the Pacing page, its pacing has already finished. Click Pace Another Class to start it again.
Delete Pacing
You’d delete pacing if you want to remove all pacing from your Child Accounts. Children will be able to move through all 26 levels immediately.
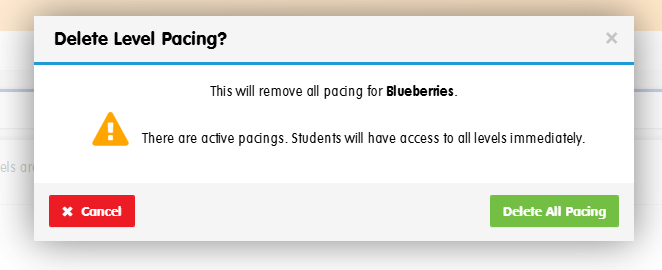
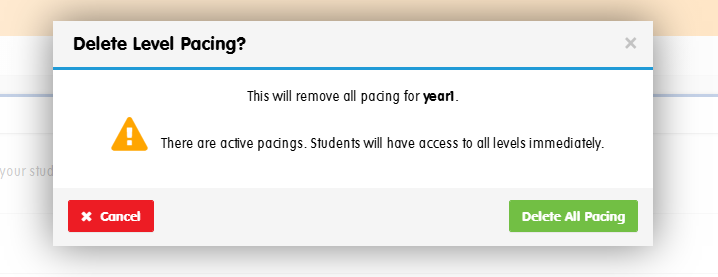
On the Pacing page, find the class and click Delete. Confirm by clicking Delete All Pacing in the warning that appears.
Deleting pacing gives students immediate access to all levels. It doesn’t affect their progress, star points, or any other data.
Can’t see the class you want to delete? If a class isn’t showing on the Pacing page, its pacing has already finished — there’s nothing left to delete.
